Friday, December 20, 2019

New Car Camber Issues?

Camber troubles today?


Rather than start at the beginning of the end, I will address this as the beginning of the beginning. I got this civic new in jan 2003 and not 18 months later I was feeling the pull of wheel to left almost all the time unless you were driving on one side of the valley of an old road. First they blame it on the tires and yes it always drove better on new tires but soon after words you'd be in the same situation or even shortly afterwords replacing front end parts and doing the alignments all over again.

 This went on for many years until I started building the 1958 Mercedes Benz, that car required me to buy the equipment and do the job myself.

So about 3 years ago I had to replace the driveshafts in the civic and I did the alignment on the civic, the strange part about doing the alignment was to get it right, you had to measure the camber while the weight of the car was on the wheels, I learned this from the Mercedes after quite a trial of effort. So when I did the civic and then put new tires on, the car drove perfect since then which lead me to believe that the shops were doing the camber with the weight of car off the wheels and once on the ground the car drives like crap.

So now to my issue with new vehicles today.

I bought a new 2019 passport this year and dang if the car drives like crap unless you have that perfect flat and straight road. So I go to check the camber only to find it also is not accurate, but when I go to find the adjustments, I find there are none, or there is no camber adjustment, this lead me back to the dealer and service manager where we already determined that they don't quite want you to do anything to increase the life of the air conditioner, it would void the warranty.

So I get to the dealer only to find my worst fears for the consumer have come true, there is no camber adjustment point and obviously the camber is not accurate. This only enhances my desire to stop buying new things like cars b/c the integrity of the industry is going in the wrong direction and rather than try to fix(sue) , or resolve, all the broken things, or issues, being made, it's easier to just give up on new and stick to the old fashion way things were made, even as primitive as some of those things were made. So just know that you do have to do the industries homework for them before you purchase their products or easily fall victim to their haste, this is what I have found going forward.


Saturday, June 15, 2019

prepping for retirement?

This car, and in particular the engine , has been problem free for a good many years. The list of things not needed done is extensive, I still use the original spark plugs, all the fluids have proven successful with all the components. Nothing in the engine compartment has been replaced, the only issue is the final drive in the transmission, after 12 years trailering stuff it makes rattling sounds but has yet to fail. I will not be using it as much as I have 2 other cars to drive and maintain, not that this is the final post, but all fluid tests have proven themselves over long periods of time so this will be its primary function and purpose.


Sunday, April 13, 2014

Backstabbers

Did the usual yearly oil change, and as it happened the every other year oil filter change. No problems but there was a surprize. The oil filter it's self rattled once I removed it, which never happened before. The other more important thing was that the oil pressure at  idle, which had gone up some 15 psi to 20 psi, went back down to 5 psi at idle. Now if we recall the timing of the raising of the idle pressure, it was at the exact same time we had the fuel loop cleared of contaminants and the raising was thought to be the cooling of the oil its self. It wasn't that at all, it was some cheese heads hell bent on trying to ruin a good thing. Now I know cheese heads, and they are not all that bright. Even thought they have have a lot of money and time on their hands, they prefer to create demons in the night for rather strange reasons, which is one reason why we switched to a higher quality brand of car, with security and peace of  mind included. They seemed to know about the oil pressure future problem, but I don't know what they were thinking after attempting that after the gauges were installed, if there was a real 100 psi problem, i would have spotted that, and right away corrected it promptly. Well knuckle heads will be knuckle heads, and this just proves once again, no one can be trusted when it comes to designing and servicing the car.

Sunday, February 2, 2014

Changing An Oxygen Sensor On The Start Of The 7th Season Of This Blog

As I was chasing the fuel issue I decided to change the oxygen sensors also, if for nothing else but to keep the computer happy. This is another job to be done in decent weather (which I did) although it only took seconds.
You need to get a $9 & change tool to do this job, it's a 22 mm open ended socket so you can get by the wire. I'll show the top first here
It's was about $50 a piece or combined, I can't recall exactly. I thought I would struggle with removing the older one but it came out like butter, almost to easy and the top was a sinch. The bottom I had to remove a plastic just to get to it, and then it popped off easy, I had to jack the car and peel back the plastic just to see him.

You are looking at where the bottom of the manifold and the beginning of the exhaust pipe meet, he goes right in there. You have to feed this one all the way from the electrical socket to the location, and the clips don't really match up with the old ones, I just wired them on the brackets to keep them in place.
 The car is just bad fast all the time and a few years ago I beefed up the strenght of my tranny lubrication so the tranny just pegs and pulls as much as you want.

 But by now i'm in the middle of doing some A-frame bushings and waiting on the weather and timer somewhat because I need to borrow a stand up press from my  neighbor who's not home a lot in order save some headaches and time. That will be the next job, and as you will see, this car was designed with ball joints that were NOT meant to be replaced, but have now weakened slightly and after I  replace all the bushings, I will decide if this is worth the effort or not. Right now when highway is not flat, the car will want to drift because the rubber bushings have lost some of their strenght to keep the car going straight.


Friday, December 27, 2013

What The Hell Is This?

I made a trip back home last summer and a strange thing occurred. I had a front end vibration in the car at home just before I left. It would only occur one one road, and at one speed, during a cruise control drive. I went on the trip, no problems, got home and the same thing happened all over again. I chased it for a while thinking it was the A frame bushings, a job I will show  at a later date, but it wasn't. Just by happen stance, I put some 6-8 month old fuel in the tank when I was low on gas and in a hurry, and low and behold the car barely started and then just died. I got a ride and got more fuel in the tank but had no luck starting the car. Then with a turkey baster i put some a small amount gas down the throat and the car started but did not run. So I put more gas and got the tach to 4000 before it ran out of gas. So I knew it wasn't getting gas for some reason. We though about it and decided to tow it to the dealer believing he would have magic to get the car running again.

[Now here should pause and explain what really happened, rather than go to cure of the problem. I bought the car new in Avon CT having a trust in the car and 4 miles on the odometer, but being very naive about the employees at the dealership. After reviewing  all the stats, I realized that someone had added about 4 ounces of water to the gas tank, and some more to the power steering pump, I resolved the latter myself, but the former was a ticking time bomb I was not aware of, but was aware enough to keep my car away from the dealer as much as humanly possible. And this turned out to be a very good thing. Because after dropping off the car, the dealer rep told me it had a blown head gasket and high mileage and they want to replace my engine with another $900 one of their choosing. I said No no no, and asked how much to get my car back? A $100 he says. Now that got me to thinkin, cause the last time I went to the dealer for a warranty power window problem at 7 years ownership, a salesman wanted to get me into a new car. I said I have a new car and didn't need another one. What I didn't know at the time was the computer was able to sense a temp differential indicating water in the fuel line (and the resultant increase in operating temp at that point of interest), and for some reason needed to get me into another car, rather than talk about the solutions to rid the car of contaminated fuel.
    When I got to the dealership the rep said they pulled a spark plug, and there was fluid in the cylinder and it should be dry.  I told him that was supposed to be that way because I lubricate from the inside of the motor also, and that was what his head mechanic had seen and reported. I hooked the car up at no charge and we agreed to disagree.]

  So now I need an actual cure and so I let the local tow man take a crack at it. The problem was a designer one, there is a fuel loop right around the point of injection which, if contaminated, will slowly prevent the fuel from entering the injectors, even a small amount of contaminant will go straight to the motor plus I had the additional water added over time from regular gas up's. Back in the cold winters day we put dry gas in the tank to keep the line from freezing, but down south I had no worries of freezing so I never added any and it built up to the point of not starting. Now resolving the issue was a completely different story, you had to drain the tank completely from the top (or under the air filter housing, the water had weakened the fuel pump so we replaced it too), then put good gas into the tank along with a bottle of dry gas (Heet), then one person squirts a continual tiny amount of starting fluid into the throat as another person  slowly revs the engine cold, from 0 up to 6000  rpm to clear the contaminate from the loop, and then drive the car to remove more. Now this my friends is enough to kill just about any motor easy, unless you did have the proper lubrication already in place because the starting fluid is dry and you are racing the engine to clear it of contaminates.

Now just the point of this alone was enough to convince me that I have to eventually get back to the diesels of yesteryear and make good on that engine before I trust another company designer or computer to cost me a vehicle that won't last any  less than 30 years or 1,000,000 miles.
 Now today the car is fine and has more power and runs cooler than ever before, but it's the thought of the design which will make me sell this car down the road. I know it runs cooler because i did the gauges and the chart of mph-vs- temp before all this,  and now it runs 15 degrees cooler in all situations. The fuel loop when circulating fuel seems to cool the oil right at the hottest point of circulation, but when storing water only increases the oil at the same location.
My recommendation is to avoid the dealer at all cost. Even though he is a jolly fellow at the point of sale, behind closed doors, he lies and wants to you to come back for continual lackluster service, and another car soon after you have paid off the first one. And it was designed that way unfortunately. A rinse and repeat scenario if I ever saw one. Good luck

Thursday, August 8, 2013

Turning The Front Brake Disks

I had a long trip planned and before I did that I wanted to smooth out the brakes at high speed, since I had never done this before and knew the tires were balanced, I didn't expect any problems with the auto parts store, and none were encountered. First I went to the O'reily's auto parts storse and made certain that their machine was in working order. They wanted $8 a disk, and about one hour of machining needed. I took the car over the folks so I had a ride to the store, and followed the procedure to replace the brake pads. Once I removed them I hung the calipers with a bungy so the brake line would not strain itself. Then with a rather large phillips screwdriver (one with a 10mm wrench option for more torque) I broke loose the 2 screws holding the disk to the hub and removed the disks. Once back on the difference was very noticeable and after 2500 hard and fast miles, this job was well worth it.

You can't see much here, but the feel is what counts after all, and it's got that  brand new car feel to it now again.

Tuesday, June 11, 2013

Air Conditioning Tips

Passed a milestone today,  which normally I would simply show and give the latest figures as to the costs per day and per mile.

But when I tested the a/c for the first time this year, it had nothing, which is rare cause I've had to add a small of freon  the past few years to get the super chill back, but even then I had something. 
So I went under the hood and removed the low end cap to hear it leaking from the valve. My refill kit had rusted thru so I hit up the walmart and get a gauge and freon (with lubricant, and NOT SYNTHETIC). Put him on the meter and he's pretty low for some reason, i'm slightly concerned about the leaking but my bicycle valve stem tool is not big enough to see if someone loosened up the thing and maybe that's why he's leaking. I put enough in to get half way thru the green zone, the added pressure stops the leaking valve, and do a road test. It works okay but when I stop the car, the cooling also stops. So knowing that a chain is only as strong as it's weakest link, I turn my attention to a/c radiator which has never been cleaned in 10 years.
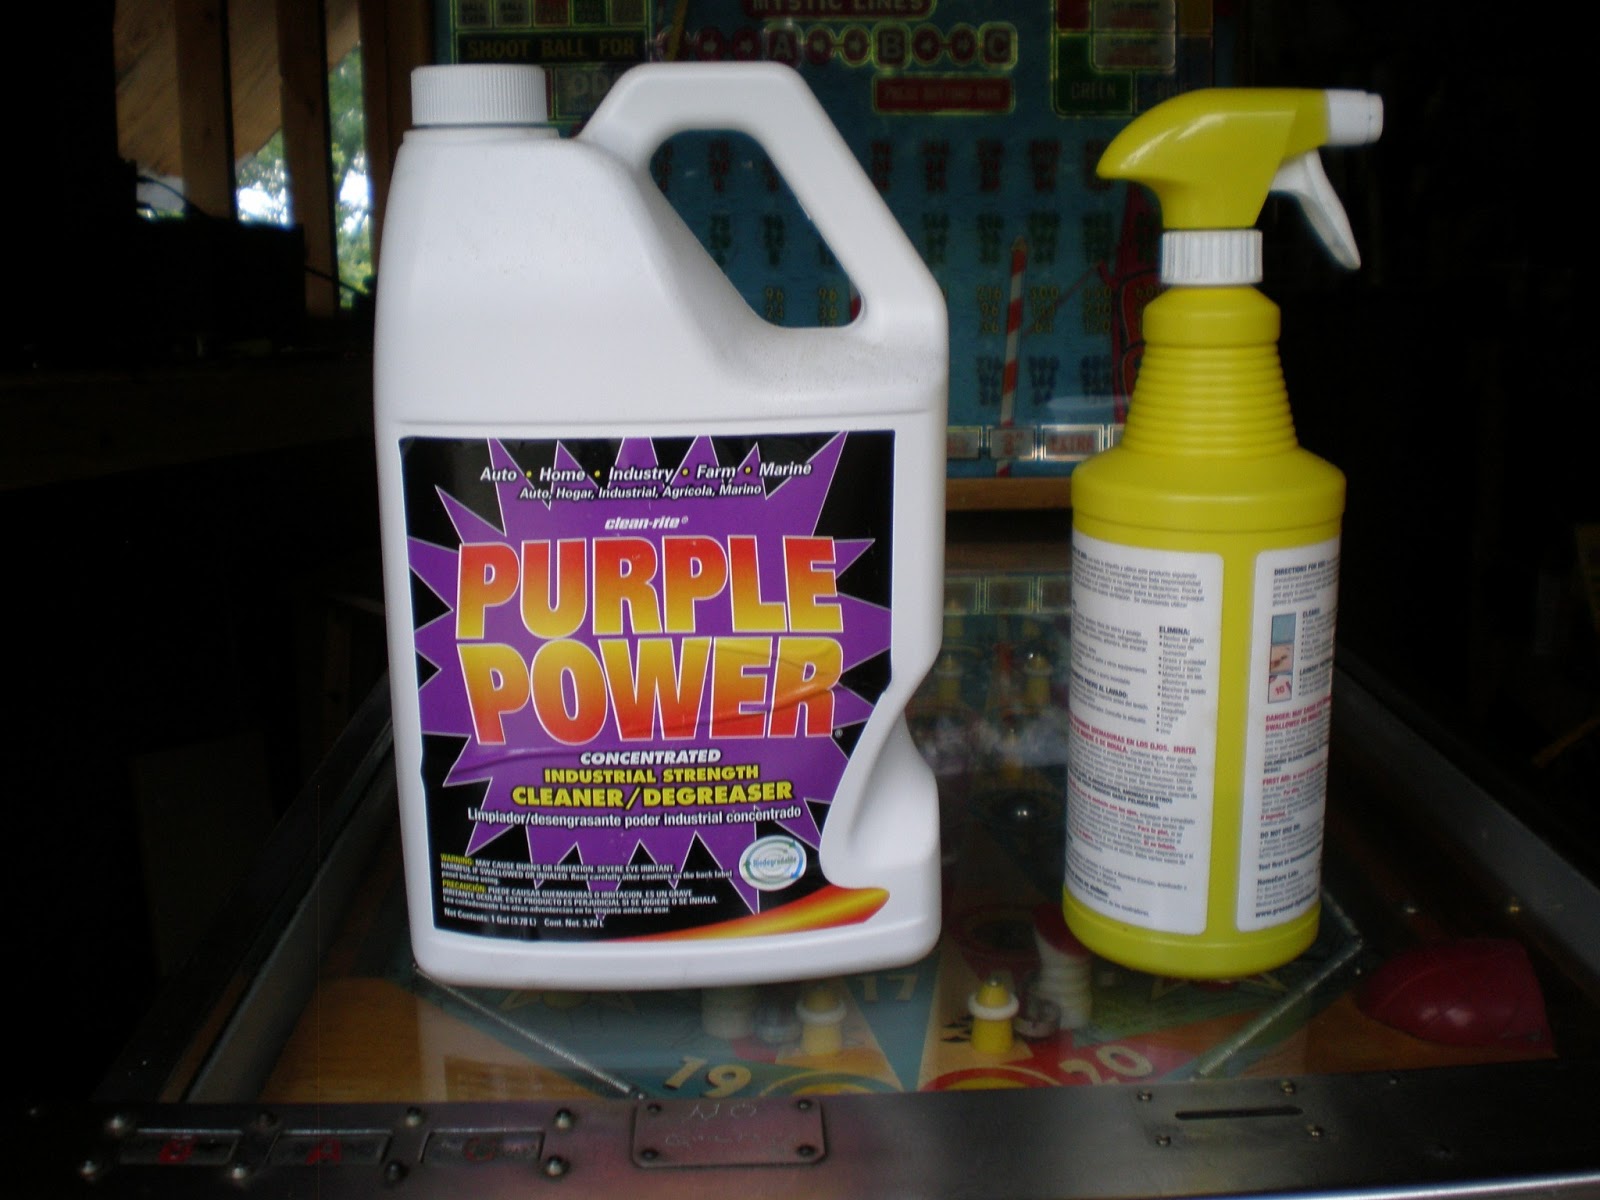
I find the part behind the bumper is clean as a whistle but the bottom working half is slightly dirty. I check around the web to find a guy who simply uses purple power to remove the bugs and grime which accumulates in the radiator.
I have an old spray bottle hanging around cause I don't throw everything away just for this reason. Right off the bat I see the brown foam coming out the front of the radiator so I keep at it liberally concentrating on the dirtier bottom half. Then I hit it hard with the hose until I see clean water dropping down. I retest that sucker and I want to tell you something, I can't recall it ever being that cold, and the freon and gauge was about $33 and the gal of purple was under $5, so i'm once again considering myself lucky to have skirted the auto shop again, at a rather low cost for the comfort of driving down south in summer. Other than that the car been haulin the mail big time, when ever and for what ever  reason I need it to do.


Friday, April 5, 2013

Power Steering and Alternator Belts Changing

Once a year I check the condition of the small belts and considering their age an dryness it was time for them to go. It's a fairly simple and quick job which took about an hour and cost $23. You are best using on sockets a 12, 13 and a 14 mm will complete the task. First I take off the left tire and remove the 2 plastic plugs to get to the bottom of the belts. Don't take off the whole skirt, just bend it down when you need to see or get to the bottom of the belt.

I found it easier to just remove the power steering pump and reservoir to get to the alt belt and so you need to remove the bolts to the pump.

You can't see it well, but w/ a trouble light there is the same type of tensioner on the alt as there was on the p.s pump. Just loosen it until the belt is removed. Reverse the order to replace the new belts and then check to see if you get any power steering back from additional grip of the new belts. That's the only thing i noticed was a 20% increase in the ease of my wheel, besides the peace of mind knowing they won't break on the road.

Friday, January 11, 2013

Ten Year Anniversary

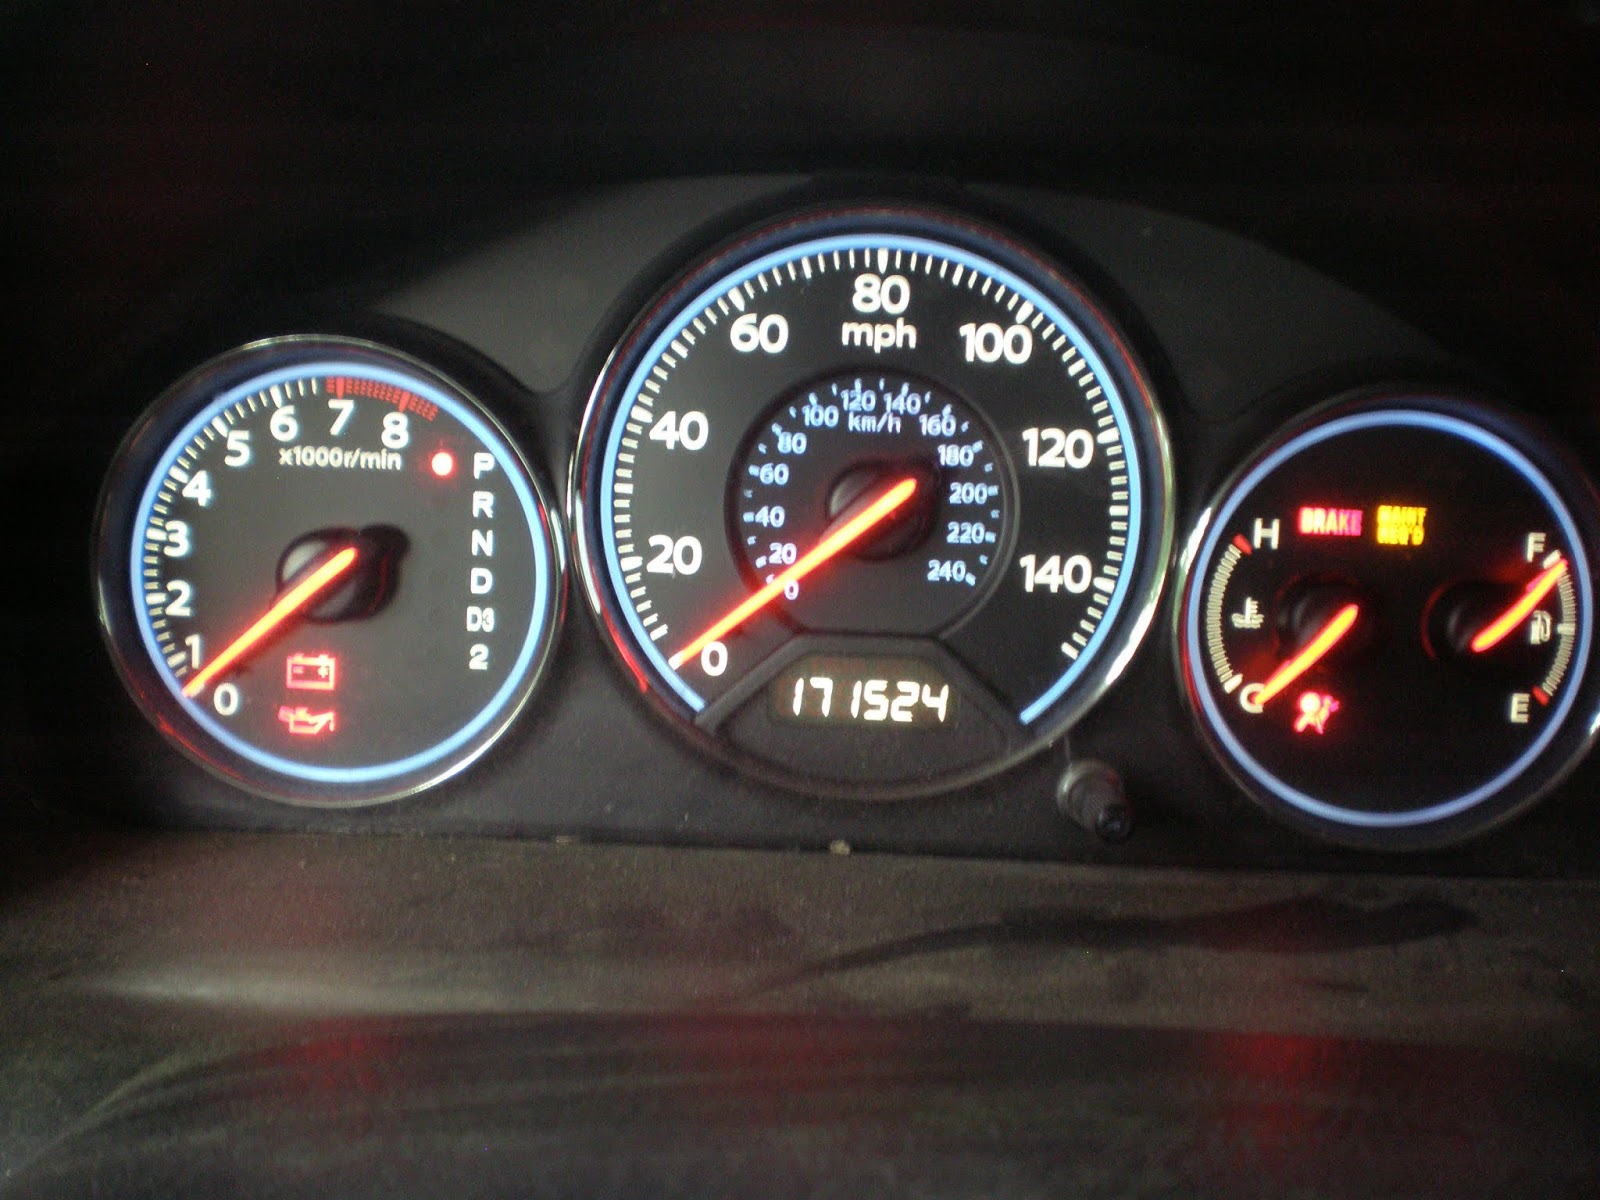
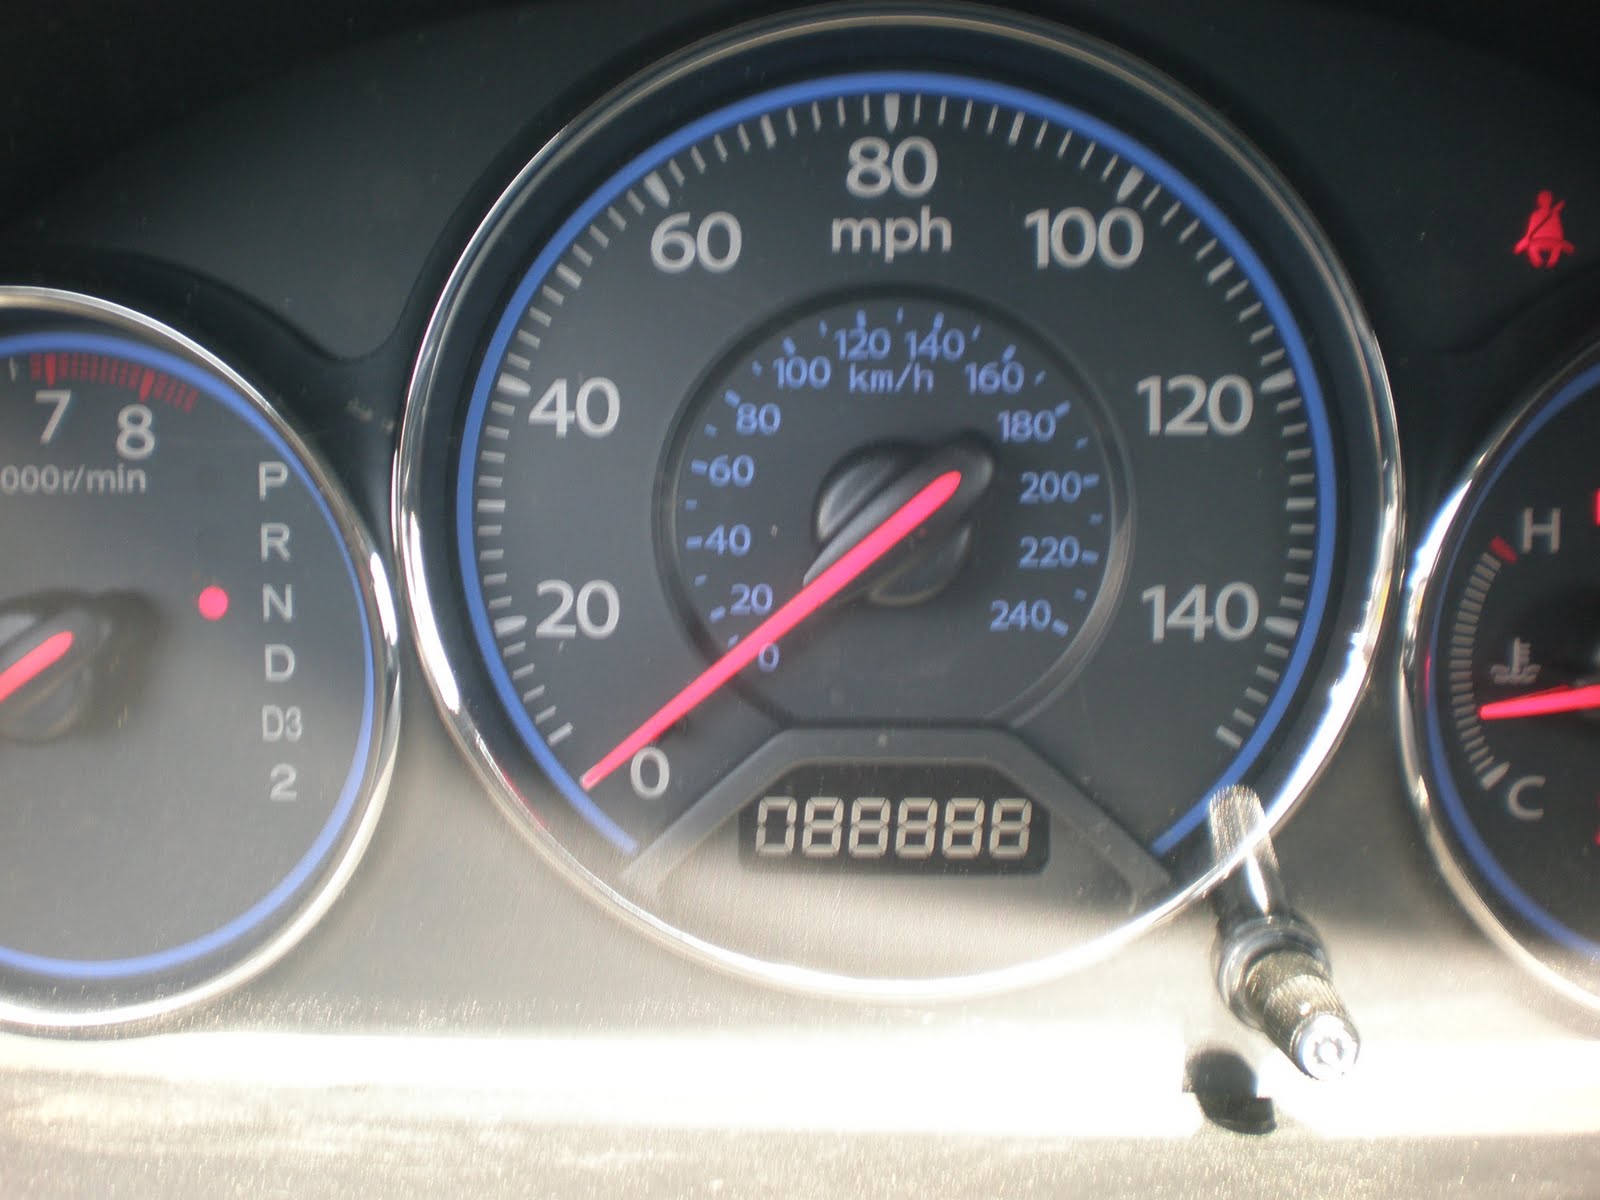
     Besides the car still haulin more than the mail. There is not much that needs saying execpt perhaps the statistics. The car averaged 10,833.65 miles per year, over 10 years, and besides the filters and lubrication costs (which were minimal), the battery and that froze inside in 2010, and the front shoes, are the only items that have needed replacing. So the cost per mile goes down to $1.67 per mile, and the cost per day goes down to $4.96 per day.

Sunday, September 23, 2012

Removing The Door Panel


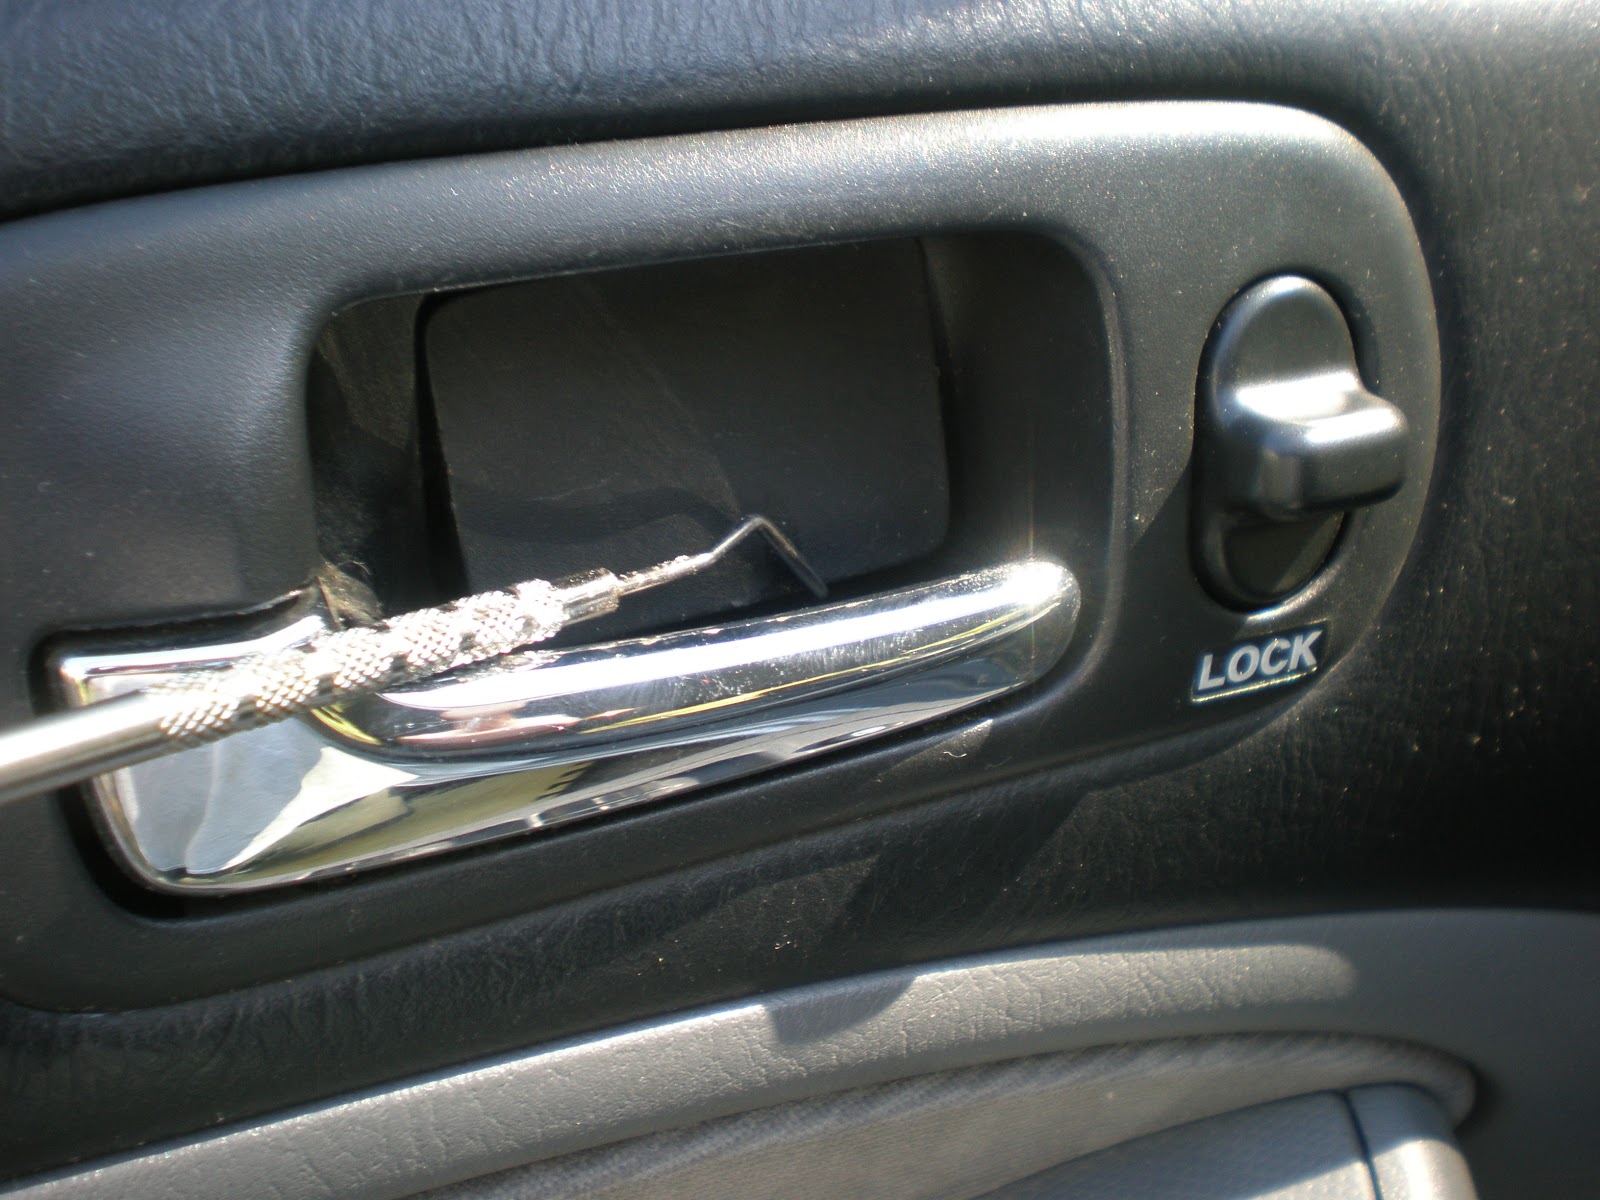
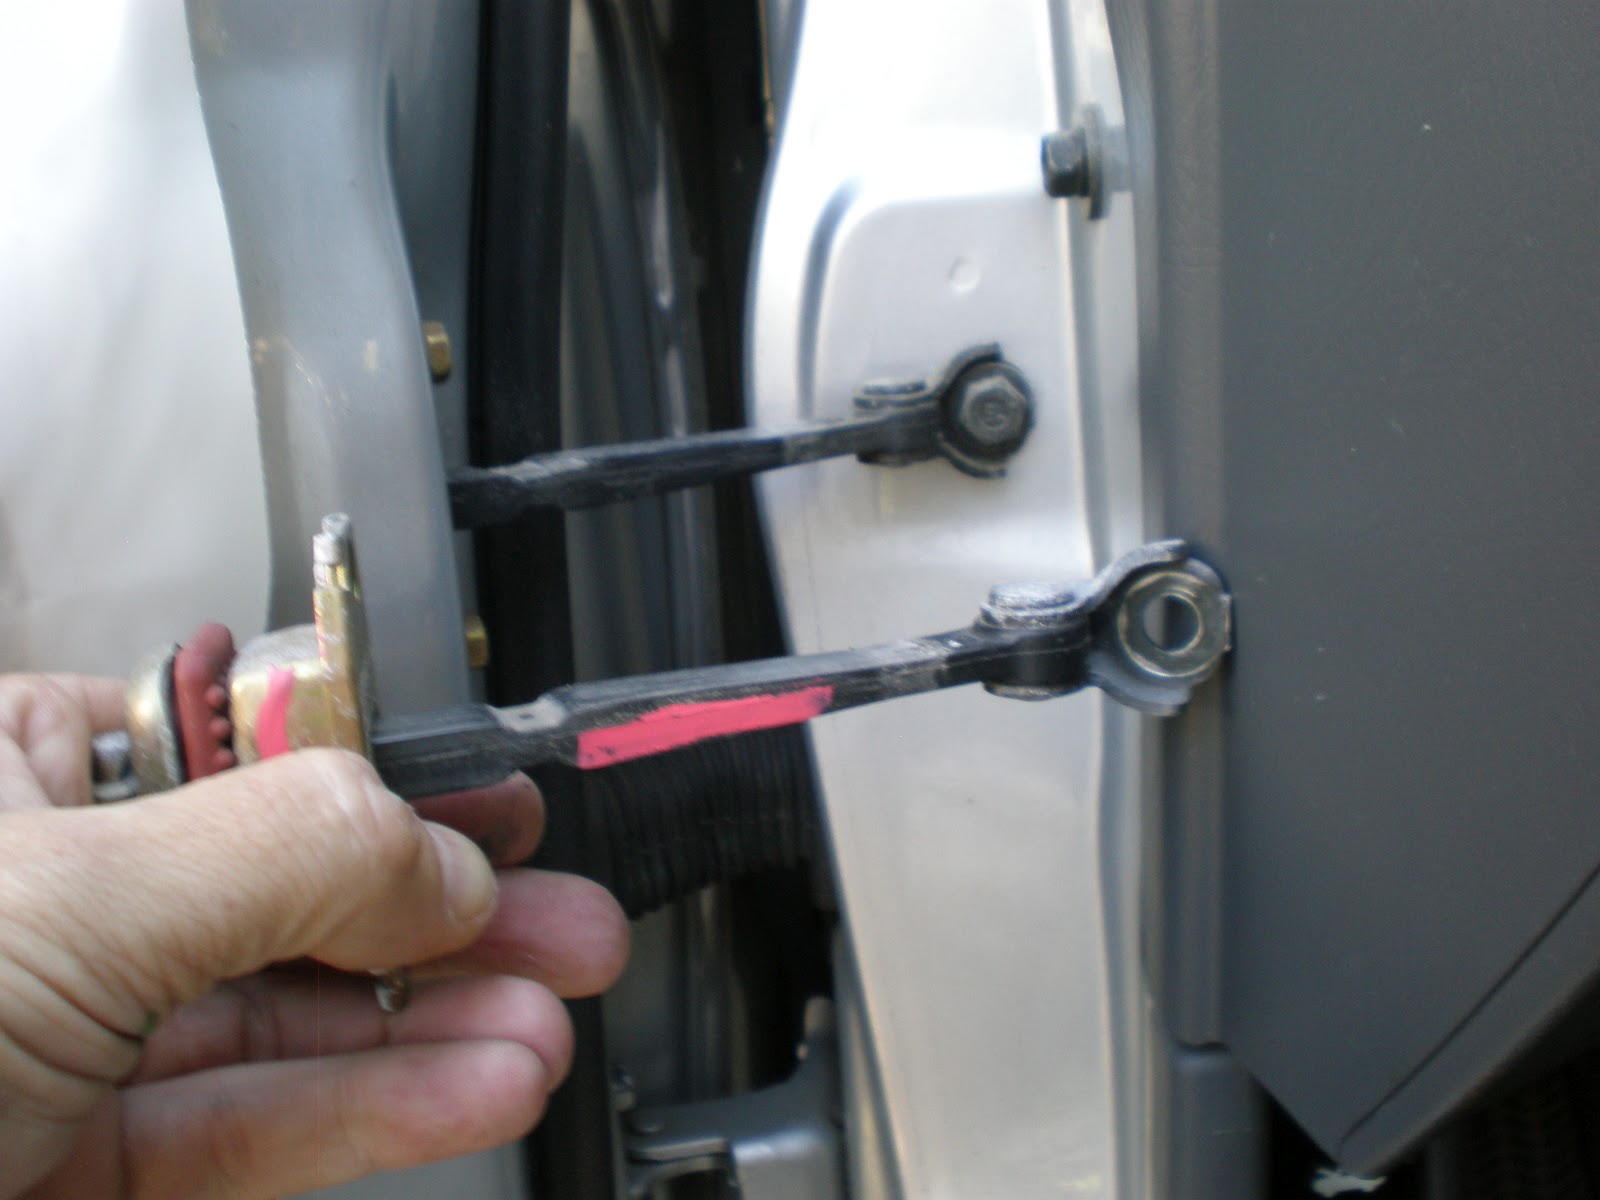
This job is one of convenience, I personally hate to have the door shutting me in as I attempt to get out of the car. So I did some diggin and found the part (which even I forgot the name of ) was not available at the auto parts store and before paying the dealer [I didn't even check the price, I am certain it costs plenty though] I called my local junk yard, whom I havn't seen in quite a while cause the car was too new and they had no parts. But this time he said he had 4 or 5 of those 01-05 civics and so I traveled the 20 miles and brought my tools.   The goal was to locate a rear door that had not been used much, you can tell by the white streaks of grease and the resistance of opening the door. Before that though, I hit you tube up for an explanation of how to remove the door panel and so here we start. Well I got lucky and there was a rear panel removed with an unused hinge, it took 2 minutes and $10 to get my part.I would get the part first from where ever, you will need some glue to put back a cover and this is automatic, dealer approved, and covered up for obvious reasons. The main reason I know this is because my door lock first went bad at 30,000 miles and so I brought it in for a one day warranty job, got the ride back home from the dealer, and when I called to pick it up, they said it would be another day. Well now I can see why it took another day, because he had to order that part on a one day shipper fee and then all was good. So here are pics of the covers to be removed and I had to use my dental tool on the top one and a tack puller I never use, never lost, but have had for many decades. Always start prying from the bottom and in this case I was quite successful.                               
                                                                                                                                                                                 
    This formating the photos has also gone down hill on this site, it won't be long before the site is gone all together one day but for now just be patient. The trick here is to start with the inside door handle cover first, then do the arm rest one, remove the 2 small screws from the upper and deep inside the arm rest are the 2 larger screws. Now the tack puller was the perfect job for this twister of a job, [you want to break as few of the plastic parts here as one can], so the lever is attached with a plastic gizmo that simply needs to be leveraged off, by pushing the plastic 3/4 round housing away from the rod it is attached to. Here is a photo but I dont know how well you can see this operation from it. At this point do not try to remove the mirror cover for the door panel itself has to lifted away from the cover to try to remove it.


Now use the tack puller on the bottom of the door panel itself to pry off the door panel going up the sides after the bottom.


Now what I did was to lift the door panel off the lock button and raise it so you can try to remove the mirror cover, he will act as if he wants to come off easy but there is a one way metal clasp holding the majority of the cover on, so when you pull it straight out or towards you, it will have to break the plastic seam holding it together, I simply glued it back on, and not to much in case I have to back in there for some reason, there are a # of things going on inside the door panel for it too be removed in the future. Unhook any electrical connections whenyou see them, they will have a tab in the center and then they can be easly pulled off. Carefully remover the plastic so you can stick it back in place, and unscrew the bolts with sockets, remove the regulator hinge, and go in reverse to put it back together, and don't forget to fish out the wire harnesses before snapping back on the door panel or like me you will have to do that twice.


I didn't have trouble aside from the mirror cover, and it took only 10 minutes or so to complete,having the right tools will go along way with this job. Good luck with your panel(s).


Wednesday, August 29, 2012

A Tricky Call

Back in the day we encountered all types of problems that took all kinds of trial and error to discover the core of the problem. Sometimes it was more than one at a time which made for a challenging time trying to figure out which one was to be of the most concern. I was helping a friend move some things with my trailer when I smelled some anti freeze. Now I don't use much in the summer and for the most part had a 95% water blend but once I got home and popped the hood I noticed the radiator over flo tank had filled up and was seeping some gasses and that was the smell I caught. Well I looked closely and it seemed to me to be a one way valve that lets water out the tank when you need it and somehow had failed and introduced water into the tank. So I had to go to the dealer to get the part (and consequently the hose to) and set to replacing it. Here is a pic of the tank cap mostly, but looking down from above the tank is sandwiched beside the radiator and under the battery.


 Now make sure you have your radio code ready because you have to remove the battery to remove the tank in order to drain the tank and replace the one way valve. So I do all that just to figure out the one way valve is no valve at all (no tips from the dealer on this one either as I explain the situation to him) but a simple plastic cylindar meant to prevent the hose from wearing on the clip it is attached to on the tank. Come to find out that the hose simply is attached at the bottom of the tank and runs to the radiator cap where it takes or gives water according to the pressures inside the cooling system which are generally cause by the heating and cooling of the engine. So I took off the radiator cap to find one of the rubber seal had wore out and split in two and so this became the # 1 culprit because all along the temp gauges never budged a degree and that is where the extra pressure always came from in the past.  


I went the auto parts store and bought another cap, the original probably wore out quicker than it might have if I had not changed to a anti freeze in the winter and water in the summer scenario which requires one to remove and replace the cap as many times as it takes to get 95% of the anti freeze out of the car in the spring which is at least 4 or 5 times per year, and I have been doing it that way for a year before I published it here. So now I am a happy camper because I just drained my tank and got 9 and half years out of a cap that only cost about $7 to replace and that's my kind of dealeo, plus I had my code so now the radio works without having to pay $40 to get the code back. (I later found the card code in my wallet, but in a pinch some years back I had to pay).
 

 So now i'm on the tank again like a hawk, I don't where the water goes to need to be replaced in the tank if there are no visible signs of water leaving the engine compartment, but 2 to 3 years after I bought the car the tank would need checking and filling, and I heard all sorts of horror stories if you let the tank run dry. You never smell the anti freeze on the way out, but the tank is low for some reason, so it was what it was.
 

 Well, low and behold I check the tank a couple days later to find the damn thing filled up again, and now I think I'm about to start steamin just to figure out what in heck is going on here. I know the water pump is working because the water temp is fine, and its not leaking anything, and that's my first signal that the pump is the problem so next I turn my attention to thermostat. I start by purchasing one, and the gasket used with it also.   This job is not listed in the manual, for good and profitable reasons, but next time I would replace this every 5 years no matter the condition.  [In the past when we had radiator or over heating problems, it was simply easier to pull the thermostat completely and the problem was always resolved, before that we just turned on the heater in the summer, which was okay until you moved down south, and then your body would take the toll. It worked until winter, when then you didn't know why you had no heat on your feet and that lead back to thermostat and the trial and error of an over heating motor.]
The housing is located below the upper hose, first remove the plastic wiring harnnes and the bracket too, this will save your knuckles from getting torn up in this procedure, once removed with a10mm socket , keeping the lower hose attached, you will have pry out the thermostat with a screwdriver and some water will flow out. The direction of the flow of  water through the system is from the lower hose, and into the thermostat. Which opens from the heat of the engine block.

 It was tough to see at first, but a wonderfully designed part is what created the over flow problem to begin with, and if you were to have to have brought this problem to the dealer, you could be looking at a hugh bill if the dealer decided you needed a water pump, and or a timing belt, or a whole host of scenarios depending on which path he decided to take you at that moment [there is no doubt in my mind at this point] Because upon close inspection of the thermostat you will see a strong rubber gasket which has moved into the flow pattern of the water pump and caused a blockage of the flow through the thermostat. This is what caused the tank to over flow, and even more than that, the efficiency of the cooling system is compromised because of this. Now these cars and my methods were enough to prevent an over heating of the motor, even though the water stopped circulating, but the real improvement was in the transmission, the transmission cooler is located at the bottom right hand corner of the radiator, which had no flow because of the design of the thermostat and the position of the cooler. I noticed this as I cruised controled at high speeds, the transmission did not down shift as it usually did because now it was operating more efficiently. I removed the part of the rubber which can be seen at the tip of the ice pick in the photo. The new thermostat did not have this extended rubber part, which is how I figured all this out.

Its a tricky little design meant to get you to put trust in the dealer, and for him to profit handsomely from it, just not in this case.


Thursday, February 2, 2012

100,000 Mile Engine Wash


        Its been 4 years to the day since I started this blog and I have enough material for a masters in addition to half the material for a doctorate degree. I could have started the blog with this phrase but instead showed the problems first before the cures.
       The trick to proper lubrication is using the right componants in the correct amounts at the right time, or the thin films of oils are evaproated along with the protection of metals they provide. Even accomplishing this requires a more complete cleaning than simply changing your oil. Two things to take note of here, one is when you hear a clicking exhaust valve, it is the burnt carbon build up that has stopped the lifter from completely closing affecting performance. Mine came around 100,000 mi but yours can vary. The solution is to get a pint of engine cleaner [I used Sea Foam] and put a half can before the oil change, (we used to use kerosene in the old days but soon relized that kero does not have too many lubricating property's and this would breakdown the lubrication process). I drive the car about 10 miles and let it soak in for the nite, drive another 10 or so and park it again for the nite. Then I use the other half pint and drive around the block 5 mi or so and dump the oil and filter, I like to use a wrench off filter with a one inch socket and a breaker bar and I let the oil drain all nite. I noticed a thick hot/warm oil coming from the filter and this was one  way to know that a good portion of the dried exhaust carbon had been removed and was now ready for the new lubrication. The second thing to take note of, is the smell of the engines inside from the valve cover, it will smell and could look like burnt carbon, but after the wash and new lubrication oil has circulated some, the smell should be reduced or gone altogether, mine smelled as fresh as an engine with 96,000 mi could ask for and this was only done once during that time, it can be done more often but keeping the films of oil between the rings and cylinders is of upmost importance and this is the only time you fall victim to that occuring. Next I will study the tranny and power steering and see about removing those possible buildups, although it may be just as easy to do it when I remove and add those fluids for I don't have the equipment to remove all the fluid at once, as we do with the engine and so a different approach will be needed. The car starts slightly better but it already started lightning fast so the improvement was minimal considering there was not to much further to go from where I was.

Friday, January 6, 2012

Cleaning Drum Brakes

The blogger no longer uploads video so I had to create a way to link w/ it and you tube was the way.
Notice I have a catch basin for the dirty liquid, and I covered all parts except for the shoe padding itself. The spray goes on sale twice a year at napa and was $2. I didn't spray the rejuvenator on the rubber boots, instead I used a can to place the oily substance and rubbed my finger around to cover the whole surface.  
http://www.youtube.com/watch?v=TRfSwlCf3ZQ

Thursday, November 17, 2011

CHECKING TIMING BELT

    I dug into some others experiences with the timing belt issue and was suprized to find many that assumed an automatic replacement at @ 100,000 mi was a safe and good investment. It can cost well over $500 and back in the day we got as many miles from the belt as we did from the engine parts.
    So I looked into what it would take today to view the belt before replaceing it. It was major, and before I got there I read some horror stories of those who attempted to do it themselves and the complications that one can run into. I recall the teeth of the belt getting thinner and effecting the top end timing of the motor before we replaced a customers belt. So that was my indicator all these years later as to weather or not  to replace the belt. I looked at the cover myself and could not determine an easy way to remove it and cop a view, finally I found someone who said you had to remove the camshaft cover before removeing the timing belt cover.
     Well that was more involved than I thought I should have to go through so I did a 180 and decided to drill out a hole on the side of the cover and get a look at the teeth of the belt that way. I used a 3/4 inch forstner bit and drilled 2 holes in the strategic location and then used a wire cutter to snip off the remaining bits of plastic being very careful not to get any shavings or bits into the inside of the cover. [you could drop alittle bit down and be okay but that is a concern when performing a surgery such as this.
      It revieled just what I thought it would, a perfectly new belt that has no viewable wear, and I checked it a dozen times over the course of a month to get a different spot on the belt and it always looks the same.
      I checked the rear brakes again and they will last another 6 months and sprayed some brake cleaner to remove the dust. The car has 94,500 miles and has only recieved a battery and front pads, besides the occasional filter and one light blub.

Monday, July 25, 2011

REPLACING YOUR DOME LIGHT


This can be a tricky job, and probably costly once parts start being broken. You will need a proper tool also, just using a screwdriver probably won't cut it. Get a chisel at least 5/8" wide to 3/4". You will notice a seam between the plastic cover and the grey housing unit, place a sharp chisel between the two as shown in the photo, then carefully twist the handle of the chisel to the right or left and you will see the two separate, pry from the other side if need be to release the cover. The local auto parts store had the replacement bulb for (2/$5), simply replace it and snap the cover back into position with your hands. This could save you up to $20 from having another source do this simple task.

Thursday, June 30, 2011

Milestone


Even though the car has been paid off and not consuming parts, this is where the true savings begin taking place as far as I'm concerned. On a trip back home I crossed that threshold and documented the event. Still to date the only parts that have been replaced are the front pads and the battery, although I noticed the dome light is on sometimes and off sometimes so I might post that job soon.

Saturday, January 22, 2011

Transmition fluid change


Now is a good time to show thewayof changing your automatic transmition fluid. There are many facits to this job that require alot of research or the entire tranny can fail.





These particular transmitions have internal parts that get very hot, hotter than a regular one. Because of this they need special fluid only available at the dealer for an increased fee. There are 5 quarts of fluid but you can only remove 3 of them at one time. Leaveing the old fluid behind or wasteing new fluid to dilute the old fluid. The book is wrong with its recomendations and even the dealer will let it stay longer than it should. 30,000 mi is the dealer figure.

I prefer to change the 3 quarts every 10-15,000 mi depending on if I am using the trailor during that span. Another thing I found was the special ingrediant that is found in the dealers fluid, only in its own contanior, that way I can even go one step beyond the dealer and add more of the high temp fluid (to regular tranny fluid ie:STP) adding insurance to the expensive high end parts located in the tranny.


And those bottles are seen in the bottle photo.
Next comes the draining of the fluid, if you put the car on a lift you may get less than the 3 quarts that I get when when I tilt the car by jacking it high on the driver side and low on the passenger side. As seen in the second and third photos.
The first time I did the fluid many years ago I found there to be alot of grease on the end of the bolt. Since the dealer did the job I had no way of knowing if they removed the mess or simply left to accumulate. It was the metal fragment wear from the high temp plates being removed with a magnet. (photo) So I did the first one myself @60,000 and then again 80,000 to find the amount you see in the last photo. This tells me that at 30,000 mi the dealer did not remove the grease from the magnet making it less efficient than had they removed it. Hopefully with the added booster fluid there will be even less wear the next time I change the fluid @ 100,000 mi. So that is about it fo now, I dont have more publishable material in the forseeable future but you never can tell when a problem might crop up so keep ckecking.

Tuesday, March 2, 2010

A worth while project


The only part of the car that has shown any wear has been my arm rest. Tired and ugly I decided to take it apart, there are 2 screws to remove it from the console and four to remove the fiberglass looking top with the cover from the base below. Next was to strip the cover from the top. These are shown in the first photo along with the new material to be used as a replacement. I checked at the junkyard and they wanted $30 for a used top with cover and online ebay people wanted $50 just for the cover alone. There are two options at this point and I used the 2nd. First is to dismantle each piece of the cover and duplicate them, then sew the new parts together and fit and glue in place. Or carefully cut the new material as close to the old cover and place the seams at each end leaving the bulk of the new cover looking as one piece. The old cover and finished product are shown in the other 2 photos. I had a $1 hot glue gun and spent $1.87 on the padding to go under the new material. The vinal was extra from sides of a waterbed I built some years back. So the total cost without tools and material should be under $5.

Tuesday, February 23, 2010

ADDITIONAL PREVENTING WEAR LUBRICANTS


Another note about fluids, about 4 or 5 years ago there was a hugh sale on complete fuel system cleaners, the black bottle on the left, they were around $3 after coupons and I bought alot, 12-15 of them. In addition I added a 50/50 mix with marvel mystery oil and with every tank full I add 1.5-2.0 ounces of this mixture. The benefits are numerous, complete cleaning and lubrication of the fuel sender, fuel pump, fuel injectors, not to mention the lubrication and preservation of the valve guide seals, these seals are a costly fix that most people ignore and just burn and add oil as needed. The other note centers around the brake fluid change, my one man bleeder was defective so another approach needed to be tried. I noticed that after replacing the front pads there was no difference in the braking system, only the peace of mind knowing I had fresh pads up front. But when I could not change the fluid I resorted to removing the contanment screen on the reservoir and just siphoned out as much fluid as I could and replaced it with new fluid. Since there is a small amount of circulation in the brake line I figured that over time this method will replace the entire brake fluid system. Now the fun part, when I got back in the car and tested the brakes they worked like better than I remember the car new, and certainly firmer than was the case prior to changing the fluid. So this delay in changing the fluid because I didn't need brakes can result in a major ability to slow the car quickly. I'll be swapping fluid every year now.

Friday, February 19, 2010

FUN WITH EXTRAS

There is practically no end to the items you can outfit your civic with, we know about the gauges and here is a video of some others. So far I have added 2 spoilers, a trailor hitch, factory rims, and a dark tinted window along with a sponcer plate.