Saturday, January 22, 2011

Transmition fluid change


Now is a good time to show thewayof changing your automatic transmition fluid. There are many facits to this job that require alot of research or the entire tranny can fail.


These particular transmitions have internal parts that get very hot, hotter than a regular one. Because of this they need special fluid only available at the dealer for an increased fee. There are 5 quarts of fluid but you can only remove 3 of them at one time. Leaveing the old fluid behind or wasteing new fluid to dilute the old fluid. The book is wrong with its recomendations and even the dealer will let it stay longer than it should. 30,000 mi is the dealer figure.

I prefer to change the 3 quarts every 10-15,000 mi depending on if I am using the trailor during that span. Another thing I found was the special ingrediant that is found in the dealers fluid, only in its own contanior, that way I can even go one step beyond the dealer and add more of the high temp fluid (to regular tranny fluid ie:STP) adding insurance to the expensive high end parts located in the tranny.


And those bottles are seen in the bottle photo.
Next comes the draining of the fluid, if you put the car on a lift you may get less than the 3 quarts that I get when when I tilt the car by jacking it high on the driver side and low on the passenger side. As seen in the second and third photos.
The first time I did the fluid many years ago I found there to be alot of grease on the end of the bolt. Since the dealer did the job I had no way of knowing if they removed the mess or simply left to accumulate. It was the metal fragment wear from the high temp plates being removed with a magnet. (photo) So I did the first one myself @60,000 and then again 80,000 to find the amount you see in the last photo. This tells me that at 30,000 mi the dealer did not remove the grease from the magnet making it less efficient than had they removed it. Hopefully with the added booster fluid there will be even less wear the next time I change the fluid @ 100,000 mi. So that is about it fo now, I dont have more publishable material in the forseeable future but you never can tell when a problem might crop up so keep ckecking.

Tuesday, March 2, 2010

A worth while project


The only part of the car that has shown any wear has been my arm rest. Tired and ugly I decided to take it apart, there are 2 screws to remove it from the console and four to remove the fiberglass looking top with the cover from the base below. Next was to strip the cover from the top. These are shown in the first photo along with the new material to be used as a replacement. I checked at the junkyard and they wanted $30 for a used top with cover and online ebay people wanted $50 just for the cover alone. There are two options at this point and I used the 2nd. First is to dismantle each piece of the cover and duplicate them, then sew the new parts together and fit and glue in place. Or carefully cut the new material as close to the old cover and place the seams at each end leaving the bulk of the new cover looking as one piece. The old cover and finished product are shown in the other 2 photos. I had a $1 hot glue gun and spent $1.87 on the padding to go under the new material. The vinal was extra from sides of a waterbed I built some years back. So the total cost without tools and material should be under $5.

Tuesday, February 23, 2010

ADDITIONAL PREVENTING WEAR LUBRICANTS


Another note about fluids, about 4 or 5 years ago there was a hugh sale on complete fuel system cleaners, the black bottle on the left, they were around $3 after coupons and I bought alot, 12-15 of them. In addition I added a 50/50 mix with marvel mystery oil and with every tank full I add 1.5-2.0 ounces of this mixture. The benefits are numerous, complete cleaning and lubrication of the fuel sender, fuel pump, fuel injectors, not to mention the lubrication and preservation of the valve guide seals, these seals are a costly fix that most people ignore and just burn and add oil as needed. The other note centers around the brake fluid change, my one man bleeder was defective so another approach needed to be tried. I noticed that after replacing the front pads there was no difference in the braking system, only the peace of mind knowing I had fresh pads up front. But when I could not change the fluid I resorted to removing the contanment screen on the reservoir and just siphoned out as much fluid as I could and replaced it with new fluid. Since there is a small amount of circulation in the brake line I figured that over time this method will replace the entire brake fluid system. Now the fun part, when I got back in the car and tested the brakes they worked like better than I remember the car new, and certainly firmer than was the case prior to changing the fluid. So this delay in changing the fluid because I didn't need brakes can result in a major ability to slow the car quickly. I'll be swapping fluid every year now.

Friday, February 19, 2010

FUN WITH EXTRAS

There is practically no end to the items you can outfit your civic with, we know about the gauges and here is a video of some others. So far I have added 2 spoilers, a trailor hitch, factory rims, and a dark tinted window along with a sponcer plate.

CHECKING REAR BRAKE SHOES FOR WEAR


For those of you who want to check your rear brakes shoes here are the risks and rewards. First you will need 2 (m8 X 20mm) bolts to remove the drum, they are 13 mm head bolts, the middle photo shows the location they are to be placed. From here you simply tighten each one a quater turn till the drum is loose and can be removed. Then look at the shoes to see how much brake material is left, mine was fine so I took a wisk broom and brushed the dust free from the inside of the drum and the brake parts. This is where it got tricky, the drum would not go back over the shoes for some reason. I realigned the shoes but there was no good spot that worked, so I looked real close and saw the gizmo that is supposed to widen as you brake in reverse to keep the shoes tight against the drum as the shoes wear. I recall from this part from some german cars of the 1970's and you could take a screwdriver and leverage the gear to make them expand or to contract them in order to remove the drum, it was hit or miss as to the direction you spin the gear but I leveraged a full turn on the gear and suddenly the drum slipped over the shoes and into place without further adieu. By placing the rim back on the studs and tightening you compress the drum back into its proper place and are finished. I do not recommend attempting to replace the shoes yourself, there is more to removing the hub to even get close to the shoes than you want to bother with, and since I can get over 100,000 miles on a set of shoes the cost per mile replacement factor is minimal. The front pads cost $28 and were the best non-metalic pads available which equates to .037 cents per mile.

Tuesday, February 2, 2010

REPLACING FRONT PADS + CHECKING CALIPERS


Hi folks, gauges work fine and will be a big help when pulling a load uphill to prevent engine damage, along with a graph of psi/temp at givin speeds which should bring a level of consistancy that can be monitored over time. Since paying off the car 2 years ago I have spent nothing at the dealer but did visit them to get a power window motor replaced on warrenty. And shortly after my last visit The maintenance light when on and we all know that is just to get you into the dealer to spend money, so I asked them to turn it off when they were fixing the window but low and behold I got the car back and the light was still on. Its these types of things that draw me away from the dealer and on to other sources that can actually provide help when needed. So i find a blog that tells one how to turn off the light and this should be good for years 2001-2005 at a minimum and possibly other years and makes of Honda. First you hold in the trip meter as if to reset it, turn the key to on and wait 20-30 seconds, start the car and the light should be off. Just repete every time the light comes on.


Having 75,000 miles and the orignal brake pads I learned that soon as one of the pads gets to 1/8 of an inch you should replace the pads so that is primarly what this post is about and I hope to work out the bugs with the video thing and want to do a brake fluid change along with the pads but the one man brake bleeder needs more parts before it will work properly ( its from China) so that will come next. I took one picture that will should guide you through this procedure. First remove the tire and have a beefed up coat hanger handy to hang the caliper off the coilspring to avoid damageing the brake line. With a 12 mm socket loosen and remove the top and bottom bolts, they are short. Then lift the caliper off the pads by pulling it outwards and hanging it on the spring above. Remove the pads by prying them towards or away from you as the picture indicates. Next using the 1/8 inch pad, they can wear differently and you will need all of a 3" clamp with the 1/8 pad reversed to compress the cylandar so you will have room for the new pads. You will have to open the cap on the master cylandar to allow fluid to flow back into the reservoir, In addition as I do oil changes or rotate tires I take note of all the rubber boots that I can see and spray them with a preserver so as to extend the life of the boot and the part it protects. I notice a thin boot around the caliper cylandar which has dirt around it and is dry to the touch from being close to a source of heat, the only other boot to have this feeling was the CV boot located closest to the engine and exaust and he was a thick boot so I can see that with out proper attention this caliper is designed to leak and probably be replaced more frequently than is actually necessary but Honda needs to make money some how so I was not at all suprised. Clean and spray the boot and put a small amount of lubricant on the metal part of the caliper so it won't squeek under brakeing. About 1/2 way through check to make certain the boot is retracting properly, my wasn't and you can't put the new pads on like this or you will pinch the boot and create a leak. Once retracted install the new pads using the proctive pad plate provided with the pads and saving the old caliper cylandar plate inbetween the pad and the cylandar. (you can see this part in the photo below the caliper and above the tilted shoe.) Once the pads are in place replace the caliper by compressing the outlets where the bolts go into and fitting on the caliper just as you took it off. Tighten the bolts put the brake fluid gasket and cap back on start the car and pump the brakes till firmness returns to the pedal. Under the best of conditions we would be replaceing the fluid also but that will be shown next time along with inspecting the rear brakes and the tools required for that.

Thursday, October 22, 2009

ADDING GAUGES


Since the car has been paid off I have not given Mr. dealer so much as a dime, and that was about 22 months ago. More importantly the bumper to bumper warrenty expires this January and from then on it its into the wild blue yonder and I couldn't be more confident about entering that wild blue yonder than I am right now.


Before you is a dismantled oil filter, as I have done since the car was new and I am happy to report that there was not any significant wear associated with the rings or bearings. This is important because it is your only way to determine if the lubricants are working properly and with 73,500 miles on the car it performs exactly as it did the 1st day I drove it.


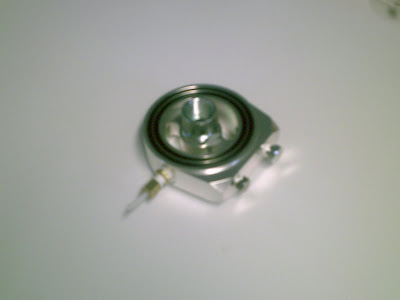
I am in the process of installing an oil pressure gauge, for $43 and tax on $17 of that this gauge can tell alot about engine condition for many miles in the future. By watching the gauge closely now when the car is still like new I can head off future problems when the gauge starts to act differently at 2,3,or 4 hundred thousand miles. Its a direct pressure gauge and I taped all fittings to ensure a leak free system. The donut is the part between the filter and block and is where the reading is drawn from. Oil flows from the oil pump to the outside of the filter, then through the paper core and back to the block through the center hole. It then procedes to the crankshaft and camshaft where it returns to the oil pan where it is picked up by the pump again. By splitting the fins of the paper core you can observe any contaminants the core has picked up and if the car is older just do the camshaft cover test mentioned on an eariler post to determine engine wear. If experience is any guide the oil pressure gauge will read about 5 bar or 75 psi when the motor is cold and just started, it should then drop to about 4 bar or 60 psi once the oil has been heated, it could drop to 1 bar at idle depending on the type of filter you have because that is where much of your oil pressure is derived, the rest is the pressure it takes to get the crankshaft and camshaft lubricated. So far the cost per mile is 24.6 cents and the cost per day is $7.30, not including gas and oil, both of these will decrease over time,